SQL, SQL Server, and Data Engineering

Sometimes, when I create a data visualization dashboard in Tableau, Tableau reads the source data tables directly from a relational Database. But that is not always possible. For example, the Tableau Server environment may not possess the credentials to access the database. Or the data infrequently changes, making access to a file more efficient. In cases like these, I might acquire data from an Excel spreadsheet, a CSV file, or a JSON file. This tutorial will show you how to run a SELECT query against a Microsoft SQL Server and write the resulting data to a CSV or JSON file.
Tools Used in this Article
To prepare for this article, I used the tools listed below. If you want to follow along but do not have the tools needed, instructions to install free versions of them are provided.
- Microsoft SQL Server – I use the free version of this database management system (DBMS) called SQL Server 2019 Express, which you can download here.
- Microsoft SQL Server Management Studio (SSMS) – I use SSMS to manage SQL Server databases and create, test, and run SQL queries. Other tools may be available, but this one is free and is available here.
- SQL Server database – The instance of SQL Server must contain a database that contains data to run SQL SELECT queries against. For my example queries, I use Microsoft’s sample database called AdventureWorks2019. To set it up, you can download the file AdventureWorks2019.bak from here and restore it in your instance of SQL Server. You can use SSMS to perform this task.
- Json Online Validator – Data in JSON format can be pasted into this free online tool to validate that it has been correctly formatted.
Sample Query
For this demonstration, I have written a Sql SELECT query that obtains the unique ID and location (city, state or province, postal code, and country or region) for all customers in the Adventure Works database. Shown below, it selects data from the vIndividualCustomer view. Note that the "TOP (5)" clause can be uncommented to limit the number of rows returned for testing.
Writing Query Results to a CSV File
To run the sample query against the AdventureWorks2019 database and save its results to a CSV file, follow these steps:
- Open SSMS and connect to your instance of SQL Server.
- In Object Explorer, right-click on the AdventureWorks2019 database name. Then, click [New Query].
- Paste the SQL query shown in the last section into the query window.
- Ensure that query output is set to the grid below the query. To do so, from the main menu, click in the query window. Then, from the main menu, click on [Query], [Results To], and finally, [Results to Grid].
- Run the query by clicking on [Execute] in the ribbon menu.
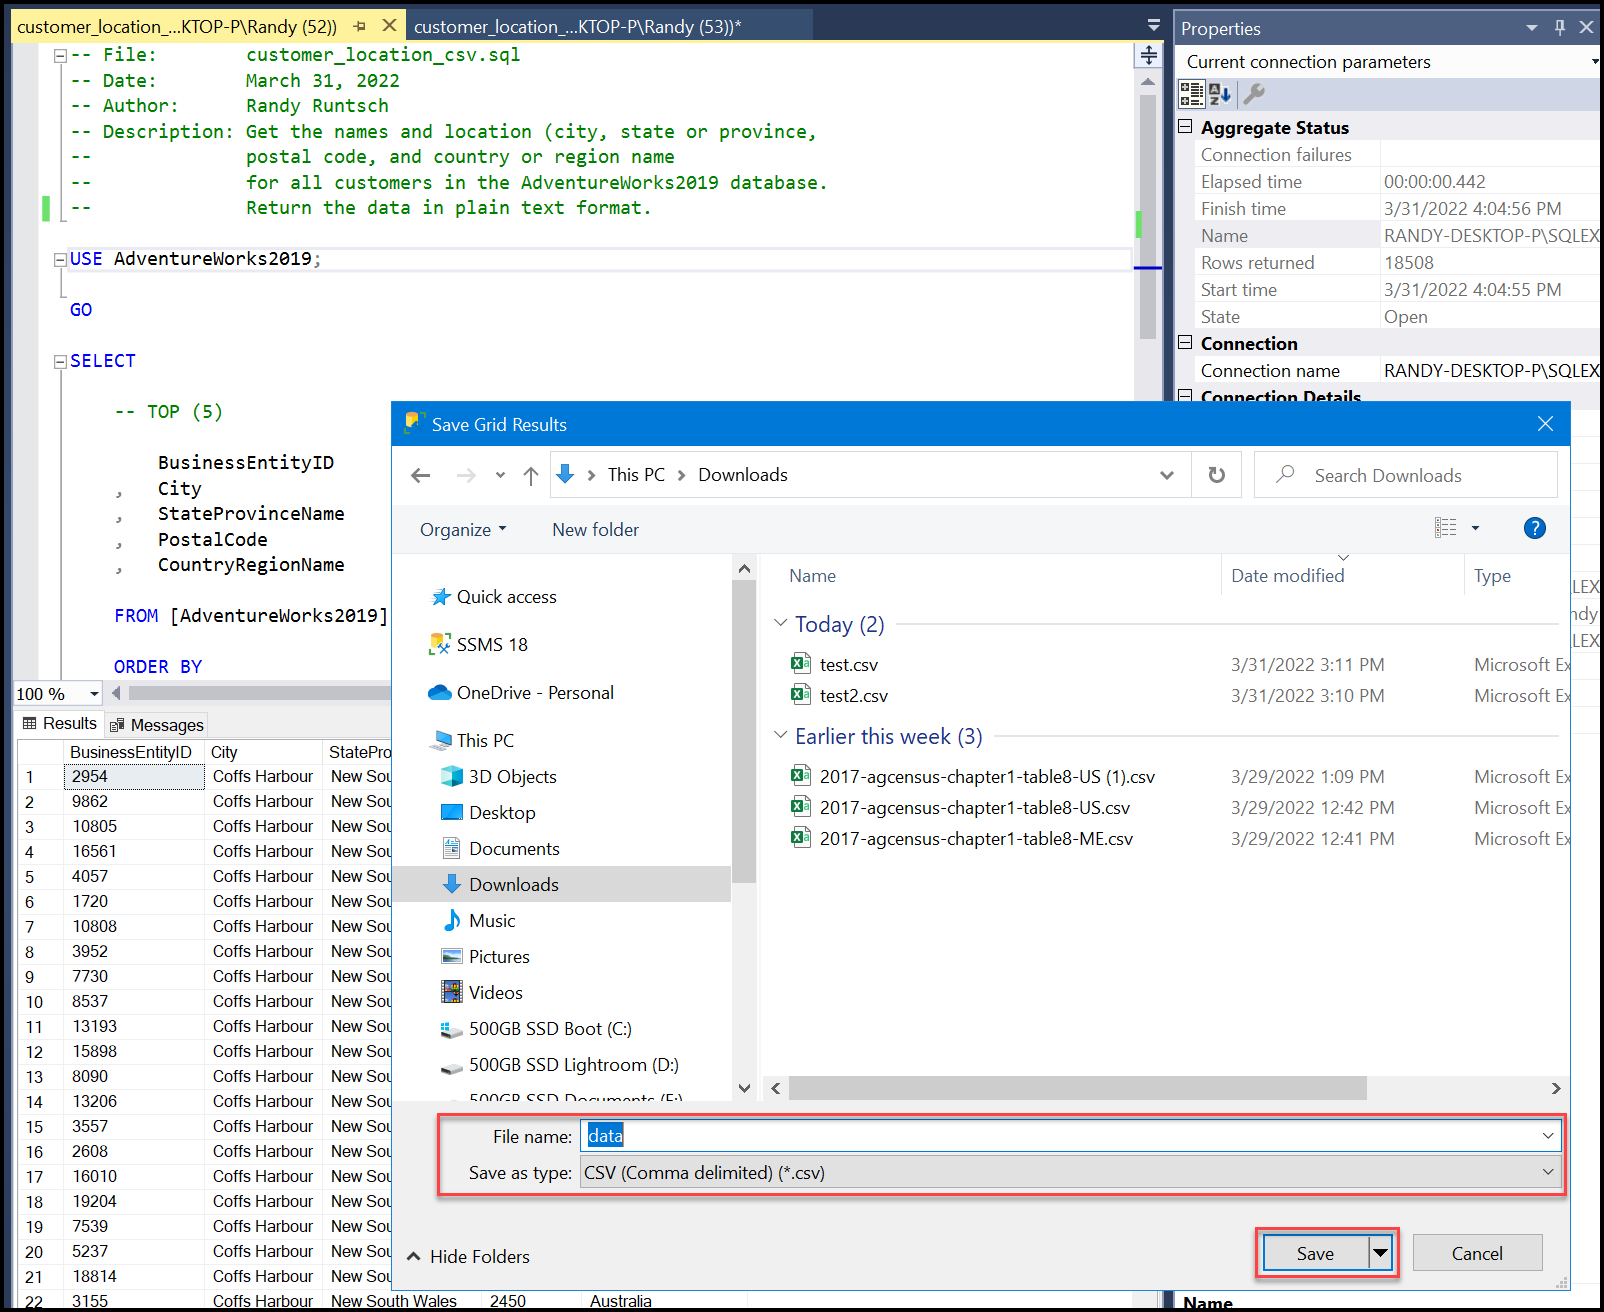
- Review the data in the results grid. It should look like the screenshot below.
- Right-click anywhere in the results grid, as shown below. Click on [Save Results As…]. When prompted, select an output folder of your choice. Then, enter a file name (in this example, I entered "data") and select a file type of "CSV (Comma delimited) (*.csv). Click on [Save] to save the file.
Next, open the file in a text editor like Notepad or Excel to examine its contents. It should look like the data shown in the Notepad screenshot shown below.
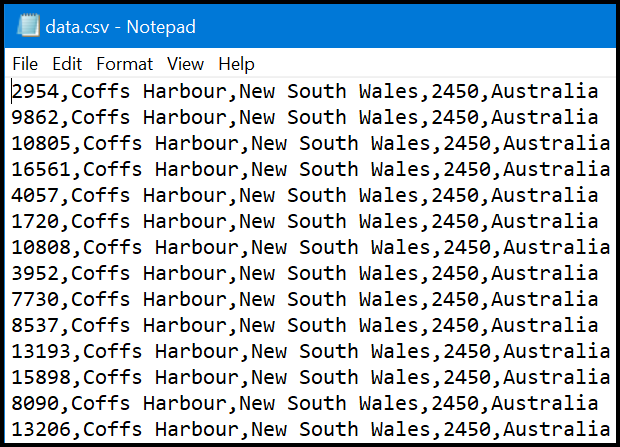
The file has been correctly saved to the specified CSV file if all worked well. It can be used for input into another tool, such as Tableau, for data visualization, or even Excel. It could also be imported into another database, for example.
Writing Query Results to a JSON File
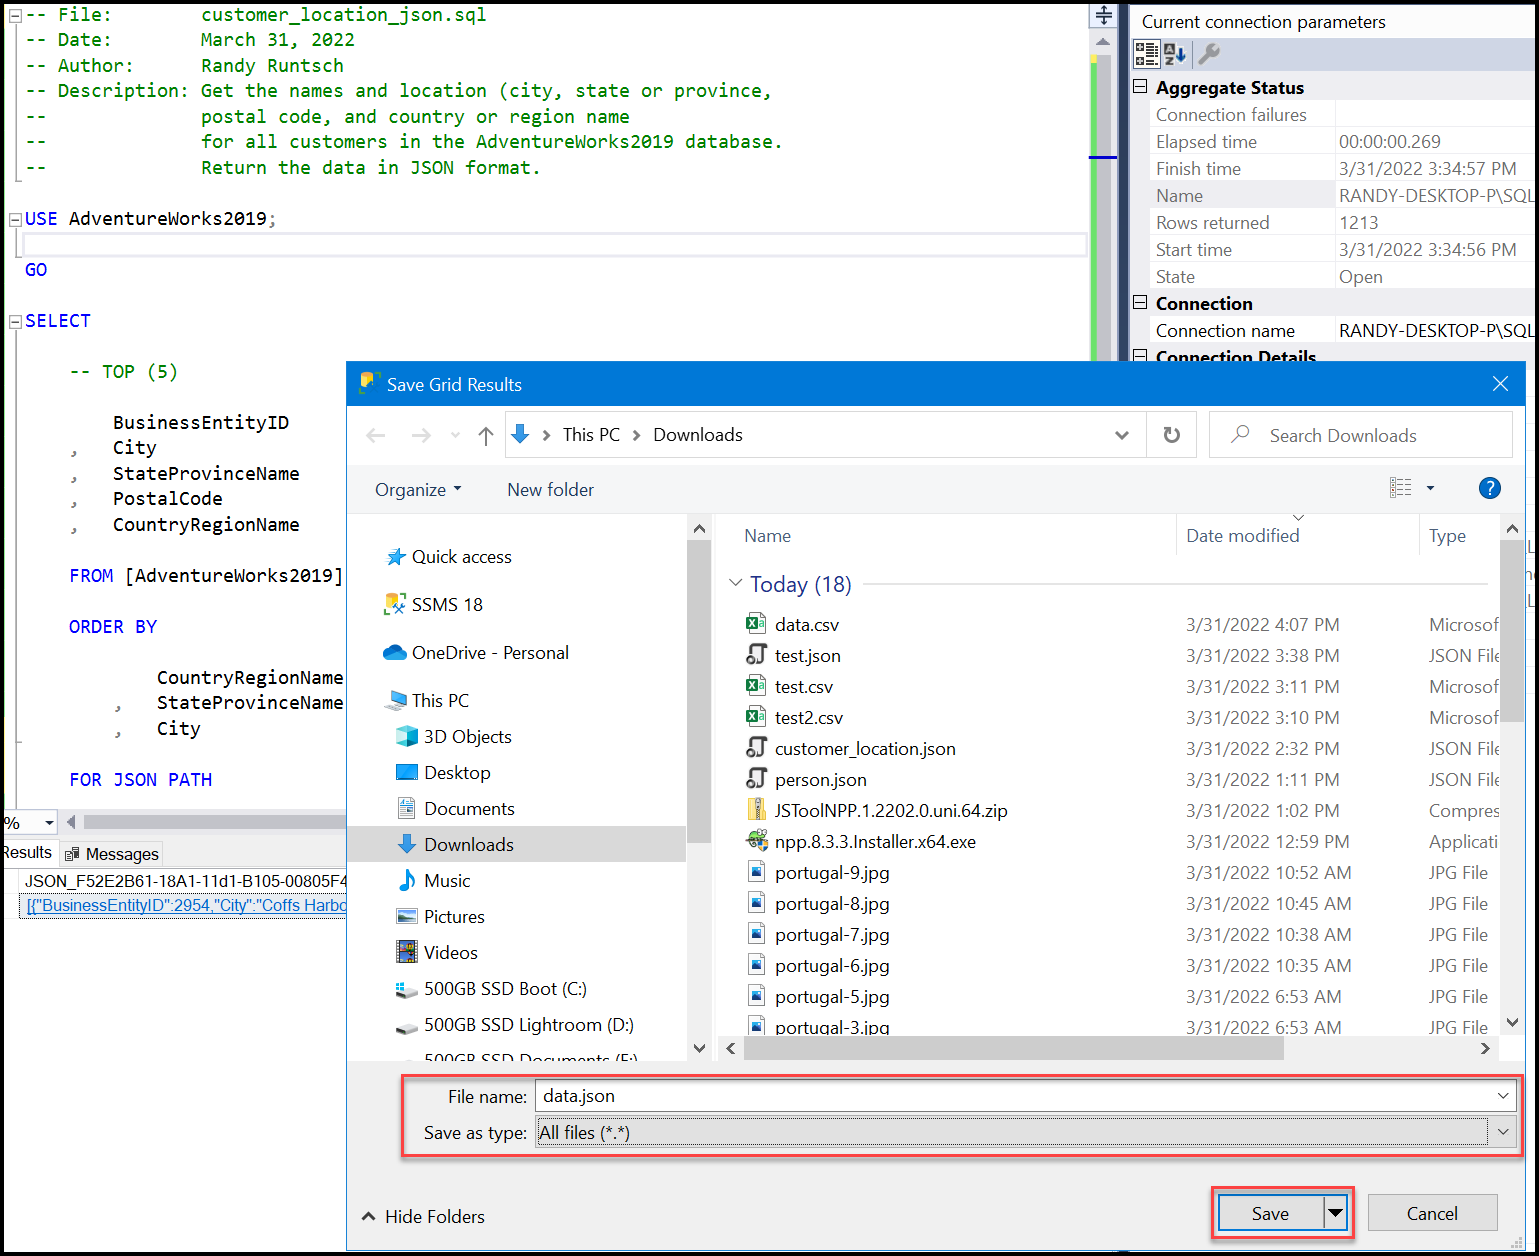
Writing SQL query results to a JSON file is as simple as writing them to a CSV file. But it involves one more step. Perform steps 1 through 5, as listed in the CSV file instructions above. Then, add the clause "FOR JSON PATH" to the end of the query, as shown in the code below. Continue with steps 5 and 6. Running the query should return only two output lines; a cryptic header that begins with "JSON" followed by one data row (which contains all the data in JSON format).
Now, follow these instructions to save the output to a JSON file:
In the results grid, click only on the result set in row below the cyptic value that starts with "JSON", as shown in the screenshot below. Click on [Save Results As…]. When prompted, select an output folder of your choice. Then, enter a file name with an extension of ".JSON" or ".json." For example, a file named "data.json" would be valid. Next, select the file type "All (.)." Finally, click on [Save] to save the file.
To examine the JSON data structure in file, uncomment "TOP (5)" in the query. Then, rerun it to return only the first five rows. Copy the resulting data from the SSMS result grid, as shown below. Then, paste it into the JSON Online Validator tool and click [Validate JSON]. The data should be formatted in JSON format, as shown in the second screenshot below.
![Copy the JSON-formatted data by right-clicking the greyed-out row below the row that starts with "JSON." Then, click [Copy]. Image by Randy Runtsch.](https://towardsdatascience.com/wp-content/uploads/2022/03/1gdt_1pDw-WYSTYwaLtGVEg.png)

Summary
This Tutorial described how to save the outputs of SQL Server SELECT queries to files in CSV files and JSON files. Those who obtain data from SQL Server databases, such as data engineers, data analysts, data scientists, and software developers, might benefit from this technique to move data from a SQL Server database to other tools.